
How-to videos have become increasingly popular with the growth of digital access through smart devices. It’s so easy to pick up your phone and search “how to …” at any given time when you need that information. They can be for any subject, such as “how to fill a tire” or “how to fold a fitted sheet” – typically things that are short, and fairly simple to learn.
In my case, I’ve made a how-to video for a basic task that anyone could use! Throughout this past week, in preparation for this video, I’ve done some reading and research that have helped me with development.
Readings:
Chapters 3: Basic Sequence, and Chapter 4: Screen Direction from The Bare Bones Camera Course for Film and Video helped me with understanding continuity in video and editing.
Basic sequences break up one long scene into several shorter ones. By doing this, it helps the viewer to stay interested, and it’s easier to watch, rather than one long shot of the same view. Schroeppel gives several tips in this chapter, like:
- Involve a change in image size and camera angle (at least 45 degrees) with each new shot.
- Avoid jump cuts, unless intentional. Jump cuts jump from one view to another dramatically – for example, a medium shot of an egg, to a close-up of an egg, without any change in angle or framing. Instead, use cutaway shots – like a view of one egg on the left, to another view of an egg on the right.
- Use smooth transitions, like cutting on the action shots. To cut on the action is to show movement in two shots from different perspectives. For example, beginning to grab an egg viewed from the right, and finishing putting the egg into the pot from the left.
- Use clean entrances and exits. A simple way to do this is to start with an establishing shot, then having movement go into and out of the shot, ending with the same establishing shot without movement. This makes it easier for the viewer to understand.
Screen direction is the direction that the subject is facing when viewed through the camera. With this, comes what’s known as the axis of action, which is the line between where the direction of subjects switches at a 180 degree.
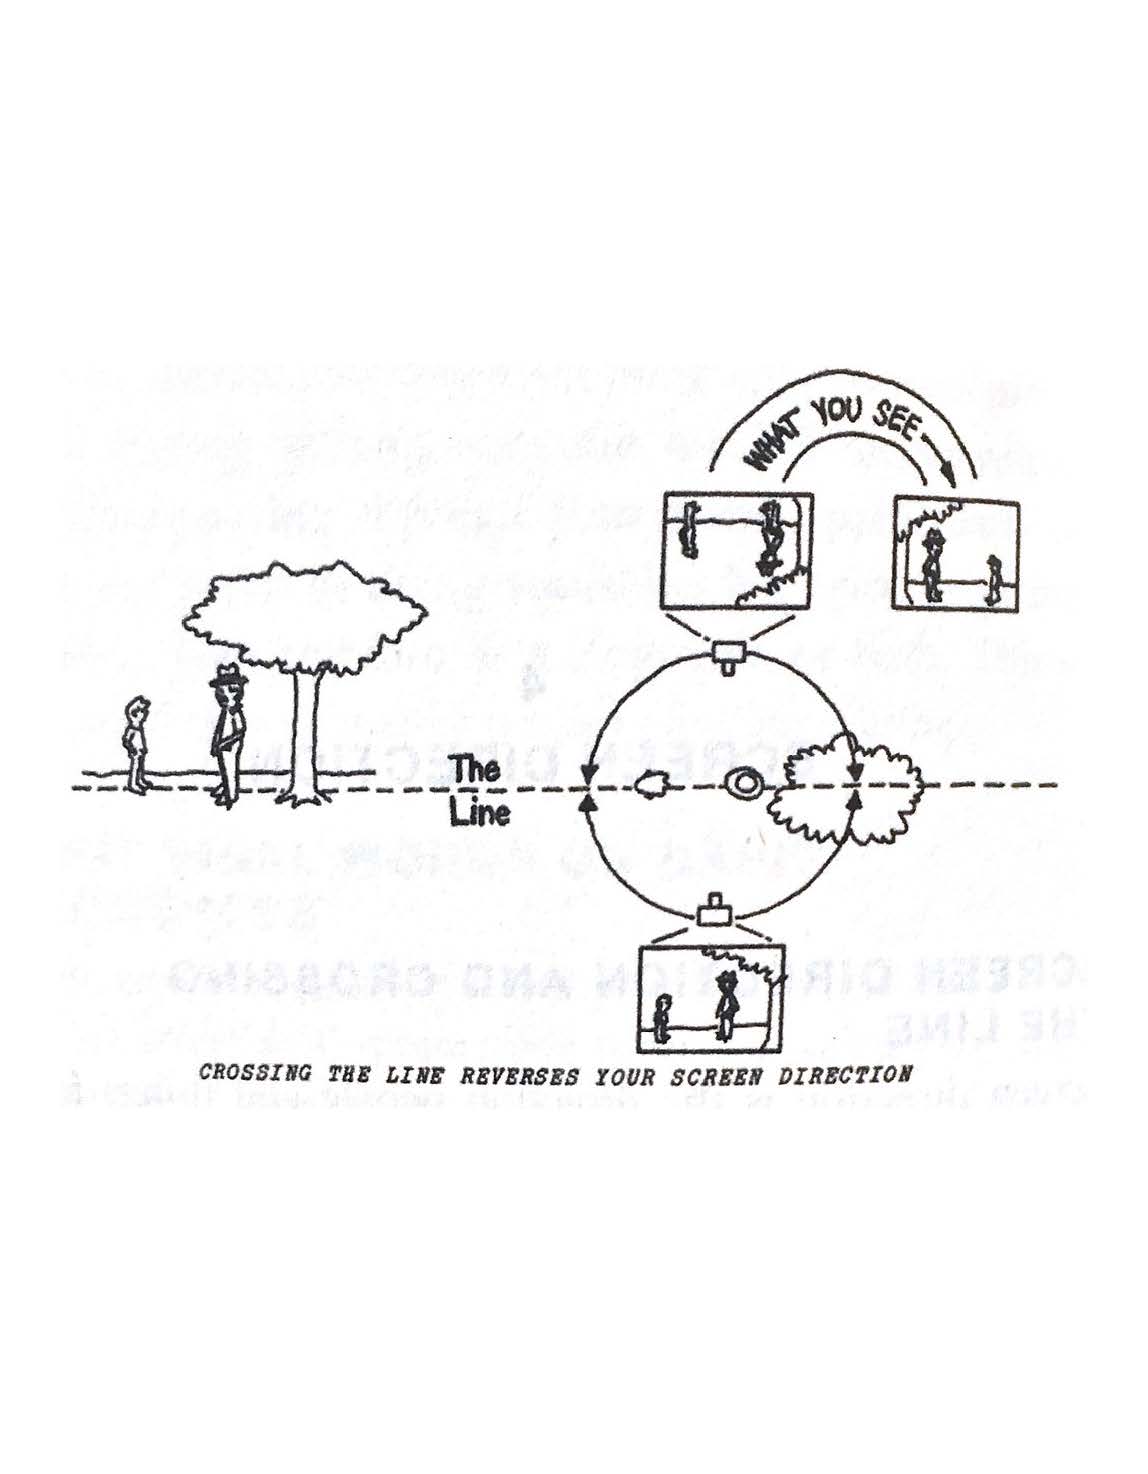
Overall, the best option is to try not to cross the line. However, Schroeppel does offer editing solutions to help prevent confusing viewers when there are shots that cross the line:
- When the subject changes direction on screen.
- There’s one continuous move with the camera – instead of cuts.
- Stopping on the line – using a neutral shot, like b-roll in between the shots where the line is crossed.
- Use a reference point – like a focal point in an establishing shot before the crossed line.
- Cutting on the action
Research:
One video I found that has very smooth transitions in editing, is this scene from Moulin Rouge! I’ve watched this movie many times, but now that I watch it knowing the differences between cutaway shots, crossing the line, and different framing, I notice just how smooth the scene is. There are many over-the-shoulder shots that make sense when the subject is talking or singing.
Another thing I noticed, is that the camera never crossed the line. The actors moved around the scene to change positions, but it was all in front of the axis, so it makes sense for the viewers. There were many chances for the camera to cross the line, like at 1:46, where the camera is just about to cross, but it doesn’t.
Here’s another scene from Mamma Mia! that has smooth transitions. An interesting thing about this one is there are quite a few pans involved in the camera movements, instead of cutaways. This is an editing technique that makes sense with the scene, as the men from the bachelor party invade the girls at the bachelorette party.
A good example to note on the smooth transitions is between 0:18-0:33, where there are a series of different close-ups, medium shots, and wide shots, all shown from different angles.
The last example that I found of smooth transitions is this scene from The Sound of Music. While dancing, there are many different shots, including wide shots, medium shots, and close-ups which flow nicely together. Something different to point out on this one is cutting on the action. There are many cases of this in the scene, but one to note is between 1:00-1:04.
Production:
So, time for my how-to video using continuity in video and editing.
I recently have found myself googling how to hard boil eggs a few times! This isn’t a difficult task at all, but while I don’t do it often, I’ve needed a refresher on it. How much water per egg count? How long do you boil them for? Well, seems like a great idea for a simple how-to video that allows for good video and editing opportunities.
With continuity, you need to film the same task several times. To get different angles and framing with smooth transitions, you can’t just take a small shot of the pot filled with eggs, then move the camera to get another one. For best results, filming the task through at least three times helps for the best results.
See below for my how-to video on hard boiling eggs!
